Hey guys! We are in full-on “Mom mode” over here. My mom got in Tuesday night and today we are heading to the nursery to find some plants to put in our front yard. But don’t worry, my sponsor Dani is here to share a cute tutorial with you guys! It’s a really creative way to keep track of where your orders are coming from or where your products are shipping to. I hope you like it!


“Hi there, JAA readers! I’m Dani from Be Good Natured, a new blog where I write a bit about my life, my shop and creating with wool, DIYs and travel stories. I’m a newbie to blogging, and I’m loving it so far. I’m not a newbie to the handmade community, though. My shop, Good Natured, turns two years old in March, and like many of you, I have been creating things all my life. So, I’m pumped to be here sharing a fun DIY with you today!
Since my little shop keeps growing, and I thought it would be really interesting to keep track of where I ship my products. So, I decided I needed a world map/corkboard so I could mark those places with pins. Map/corkboards aren’t easy to find. So I made one–and you can too!
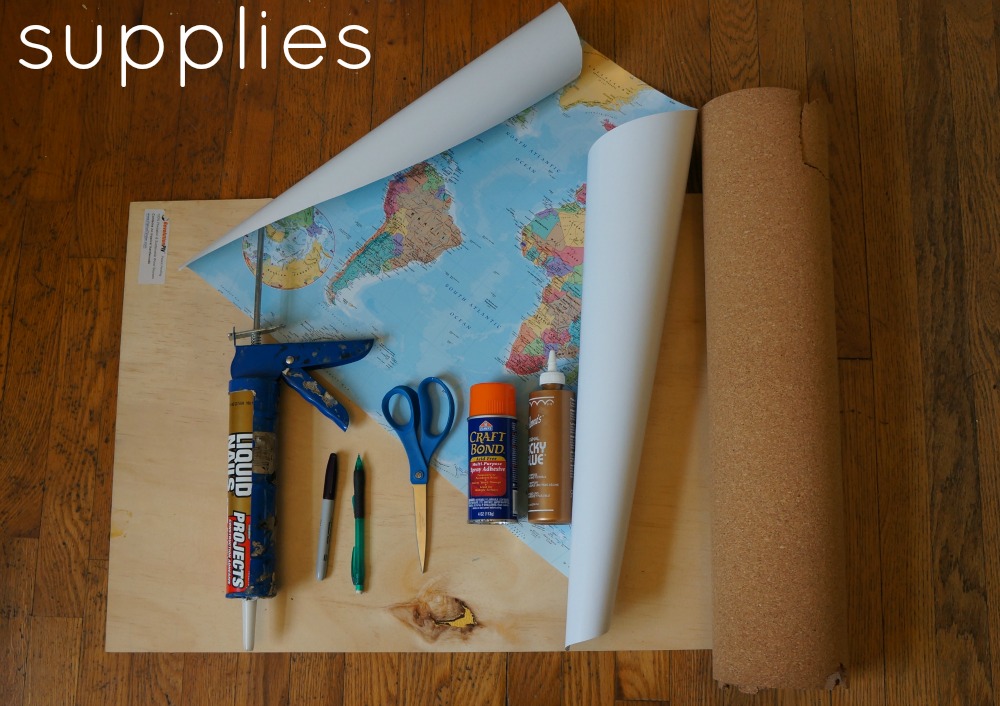
You’ll need…
A map (you can find inexpensive maps on Amazon)
A piece of lightweight plywood
A roll of cork (or two depending on thickness–available at Lowe’s or Home Depot)
Liquid Nails (or another heavy duty adhesive)
Caulk Gun
Spray Glue
Tacky Glue (optional)
Pen
Pencil
Scissors
Small sponge brush
Saw Tooth Picture Hanger
Map Pins
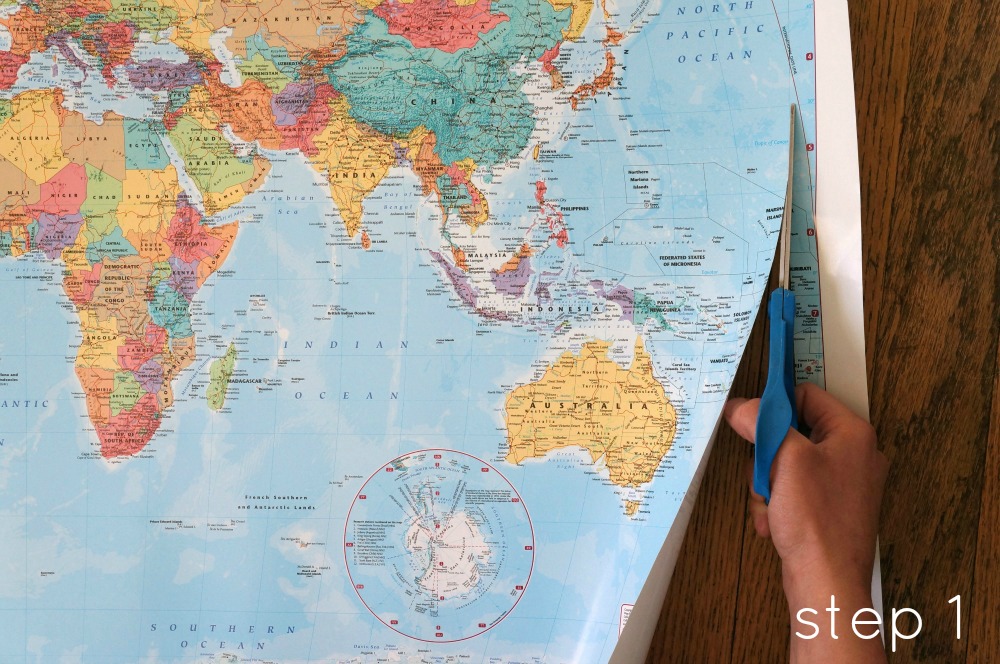
Step 1: Either cut your map to the size of you plywood, or vice versa. I chose to cut my map, since it was a little large and had a border with flags that I didn’t need. I centered the plywood on the map, traced, and then cut it out.
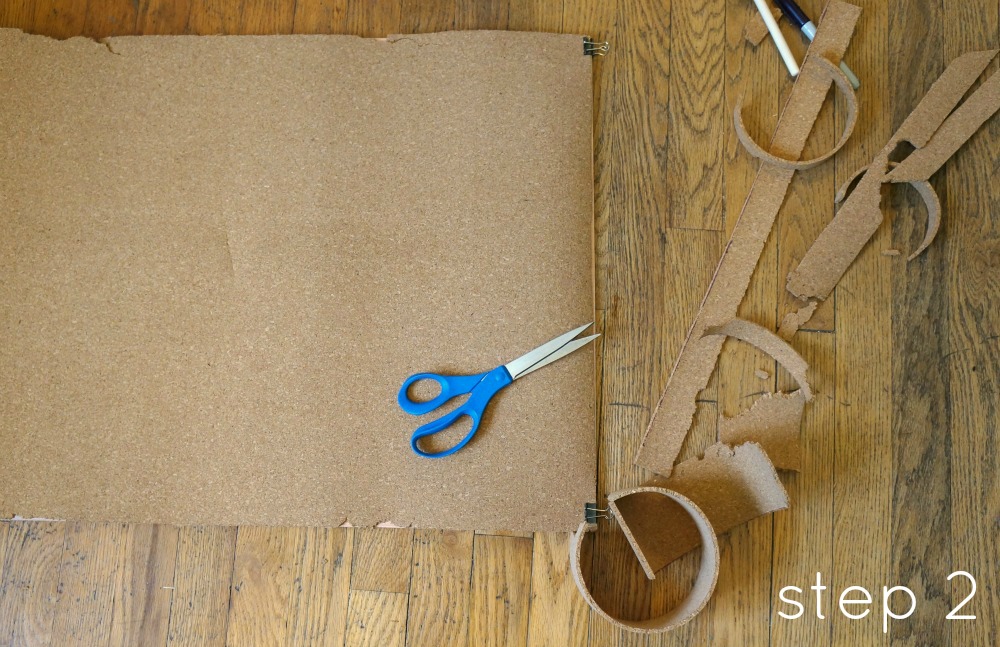
Step 2: Cut your cork to size. I traced around the wood onto my cork. The cork that I had was given to me by a friend. Cork cracks easily, so take care when cutting. You can find cork Contact Paper and other cork rolls at home repair stores like Lowe’s or Home Depot. Depending on the thickness, you might need two rolls.
Step 3: Glue the cork to the plywood. I used Liquid Nails to adhere the cork to the wood. I spread the liquid nails around with a sponge brush, which you should wash immediately if you plan to use it again. After the entire piece of plywood is covered in adhesive, carefully press the cork down. I set another piece of heavy wood on top and let the Liquid Nails dry for 24 hours.
Step 4: Glue the map to the cork. After the Liquid Nails dries, it’s time to glue the map to the cork. I used a spray adhesive for this. I lined the map up with the cork and used binder clips to hold one side in place. I coated the left side of the map with the spray adhesive, pressed it against the cork and used binder clips to hold it down. (Um, you should use the spray adhesive outside.) I did the same to the other side. I also used a dab of Tacky Glue on each corner, for good measure. Again, I set another heavy board on top of the map and let it dry for another 24 hours.
Step 5: Attach your picture hanger. After your glue is dry, you can attach your picture hanger. I chose a saw tooth hanger, which was simply nailed into the plywood/cork. Measure and mark the halfway point of your board and attach accordingly. Make sure that the little nails or screws aren’t long enough to poke through your map. I also gave each nail a little dab of Liquid Nails just to make sure the saw tooth hanger was securely attached and very strong.
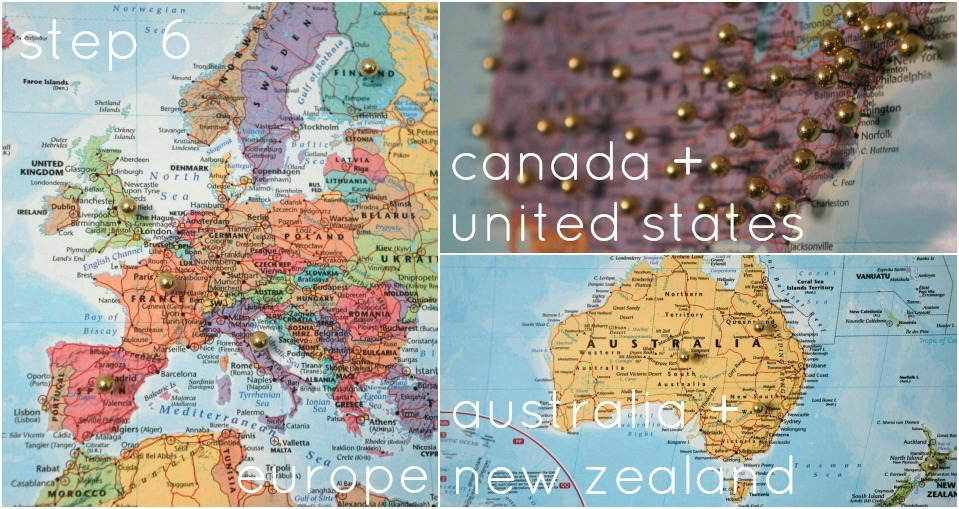
Step 6: Pin your map! Place your pins wherever you’d like to mark. You could use this map to mark where you’ve traveled, or if you have a shop like me, mark where you’ve shipped your product! I just put one pin per location.
Step 7: Hang it up! I also personalized my map with cute little cork letters that you can get in the scrapbook section of craft stores. 🙂
So what do you think? Could you use something like this in your home or for your shop?”
P.S. Don’t forget to enter the $30 shop credit giveaway to Dani’s shop here!!

This is so cute! I wish I had the wall space…maybe I’ll make a smaller one! =)
Ergo – Blog
I LOVE this idea! I’m not crazy busy with orders like y’all, but I do feel a lil special when I get to ship out an order to somewhere outside of Texas!
Oh my gosh – I am definitely making one of these when when I have my own place. I love traveling and this is so pretty as wall art, too!
http://jemaroons.blogspot.ca/
I have always wanted to do one of these! After we went to Europe it seemed more worth it but I never got around to it.
This has been on my DIY list for so long! Thanks for sharing!
xx
LOVE this and what a great gift idea this could be!
I’ve always wanted to do this!
Hope you had a great weekend!
-Sheree
The Hartungs Blog
thehartungs.blogspot.ca
i wish i had gone to all those places you have!!!
I ot here cause i was looking a diy for cork + map. So genius idea and great motivator to start travelling more!
I’m moving to a big city for the first time in my life. I am going to buy a big map of the area and mark important place on it (my house, my job, post office, bank, hospitals, airport, doctors office, friends houses police station, and other places of interest). I think something like this would make such a thing an interesting sort of functional art piece. I might use different color/shaped pins and print out a map key to hang near it.